First things first... Get the wood... At GOBY these were the two pieces I picked out...
Pretty huh? It's Walnut! It is a hardwood which is a must when making a cuttingboard. Walnut trees do grow in Oregon, so I lucked out.
Then I took some large white paper to make a template for the shape of my cutting board. At first I wanted to do some awesome design with great detail. Then I reminded myself it was the first time to use the saw so the more organic, easier shape won. Not to mention this wood is pretty and I wanted to use as much of it as I could. I pretty much used the same shape she did.
I cut it out...Nice and big.. Big enough for a long baguet.
I cut out a heart in the handle and Cole nixed that idea...
Check out that pretty piece of lumber.
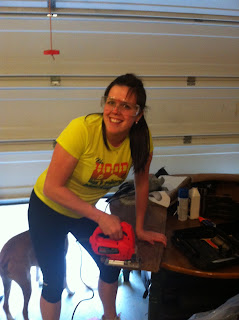
So I set off to the garage where my Jigsaw and sander were to get to work. Thats me working in my running clothes because today I signed up for a half marathon and I figured I better start training if I actually plan on running it and not walking it. Please take note of the saftey goggles. It is hardwood we are dealing with and you never know when a piece of wood is gonna get you!
The jigsaw was not as bad as I thought. It just rattles your hand a lot. All I had to do was stay on the line. And I did for the most part.....All cut and ready to be sanded.
Switch out the power tools for the sander...
All sanded up and ready to get a nice rub down of mineral oil. Do the whole board.
Look how amazing the wood looks with a layer of oil... I love it.
And TA DA.... There you have it! A beautiful, new, homemade cutting board. (I would of put some cheese and crackers and made it all fancy for you but we already ate dinner so I grabbed the next best thing..Fruit from the fruit bowl.) Ok so this is a huge cutting board and I think I am going to hang it next to the chalkboard in our kitchen under the shelf Cole and I recently hung. What do you think? I think you should make one because it was cheap and really easy. Again if I can do this so can you!


you are amazing! i love reading all your wonderful ideas daily! happy birthday to Lucy and to you in a few days!!!!
ReplyDeletexoxoxo
jess
Great Job!!!! I know what I want for Xmas
ReplyDeleteLove Ya, Marcia
Very nice! Good call on the heart Cole!
ReplyDeleteShelly
By the way, I figured out how to do the piping on the chairs like we were talking about.
Wow! This looks awesome! I'm so super impressed. Someday I want to be crafty like Mrs. Jannusch. :)
ReplyDelete