Wednesday, April 25, 2012

Cutting Time

 A couple of weeks ago I told you how I went to the GOBY Hardwood Mill in Portland. Well today I decided to tackle a project I have been wanting to do for a while now but have been scared to do.( Me scared? I know right... Actually I am a huge scaredy cat). With this particular project though I was scared to use my new Jig-Saw. So last night I had a little tutorial on how to use it and today I decided to tackle DIY cutting boards. A while back I was reading through Centsational Girls Blog and came across this awesome cutting board project here. I instantly knew that I too would need to make my own cutting boards. I mean she makes it look so easy. Also if I could tackle this, think of the christmas gift potential!
First things first... Get the wood... At GOBY these were the two pieces I picked out...
Pretty huh? It's Walnut!  It is a hardwood which is a must when making a cuttingboard. Walnut trees do grow in Oregon, so I lucked out. 
Then I took some large white paper to make a template for the shape of my cutting board. At first I wanted to do some awesome design with great detail. Then I reminded myself it was the first time to use the saw so the more organic, easier shape won. Not to mention this wood is pretty and I wanted to use as much of it as I could. I pretty much used the same shape she did.
 I cut it out...
 Nice and big.. Big enough for a long baguet.
 I cut out a heart in the handle and Cole nixed that idea...
 Check out that pretty piece of lumber.

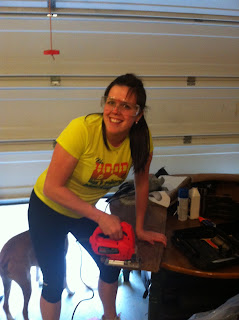
So I set off to the garage where my Jigsaw and sander were to get to work. Thats me working in my running clothes because today I signed up for a half marathon and I figured I better start training if I actually plan on running it and not walking it. Please take note of the saftey goggles. It is hardwood we are dealing with and you never know when a piece of wood is gonna get you!
 The jigsaw was not as bad as I thought. It just rattles your hand a lot. All I had to do was stay on the line. And I did for the most part.....
 All cut and ready to be sanded.
 Switch out the power tools for the sander...
 All sanded up and ready to get a nice rub down of mineral oil. Do the whole board.
 Look how amazing the wood looks with a layer of oil... I love it.
 And TA DA.... There you have it!  A beautiful, new, homemade cutting board. (I would of put some cheese and crackers and made it all fancy for you but we already ate dinner so I grabbed the next best thing..Fruit from the fruit bowl.) Ok so this is a huge cutting board and I think I am going to hang it next to the chalkboard in our kitchen under the shelf Cole and I recently hung. What do you think?  I think you should make one because it was cheap and really easy. Again if I can do this so can you!

Tuesday, April 24, 2012

If she can cook it so can I... Homemade Tortillas...


Today when I walked in the house after work, I was greeted with the most amazing smell... Sure, I was starving and almost anything edible smelling would of made me melt. Yet this was a winning smell because it was the smell of a dinner Cole had started in the crock pot before he left for work. It was a pork roast from the depths of our freezer that he lightly seasoned with salt, pepper, garlic powder and a taco seasoning pack. He said he also chopped up half a red onion and threw in a cup of water.
As I sat there salivating hours too early, I thought about the many possibilities pork left us. However, all I could think of was tacos. I love tacos. I love everything you put in tacos. I love Taco Bell and always will. I could eat tacos anytime of day everyday. I knew I wanted pork tacos and I also wanted them with flour tortillas. You see we have some frozen freezer-burnt corn tortillas in our fridge and I didn't want to use them. I sure as hell wasn't walking the babies to the store today because unlike yesterday, it was nasty outside. So I did the next best thing and googled how to make my own flour tortillas. That's when I found this lovely tutorial/recipe here called Annie's Eats. She does a great job of making them look easy to make. She also takes some really great pictures so be sure to check her out for a more detailed beautiful version.

OK let's get started. Let it be known that I cut her recipe in half because I have a small food processor that fits on my blender; not a big one. I also only have two and a half mouths to feed.

So here is my half version that yields about 6 tortillas
1.5 cups of flour
1 tsp of baking powder
.5 tsp of salt
2.5 Tbs of shortening
1/2 C of water

Put in all the dry ingredients into your  food processor and mix for a bit.

 Once it is mixed and crumbly add the water slowly until it forms a ball
 Like this....
bring the dough to a lightly floured surface and separate into 6 balls
 Flatten the dough balls into circles...
 Then roll them out. I was sloppy about this and didn't care how circular they were. I just wanted to put them in my mouth. (Annie has a sheet that helps her to make them into perfect beautiful circles.)
 Roll them out nice and thin...

 Then transfer them to a hot skillet. I used my cast iron. Now listen carefully... you only want to leave them on for a short time. Annie suggests 10-20 seconds on each side. Make sure to not leave them on any longer or else they will get hard.


What you get next is pure magic. Homemade tortillas are amazing! They are like eating soft, warm, clouds of goodness. I really have no idea why I have never attempted them before. They were not hard or expensive.
Here is a finished product of our dinner. YUM. That tortilla is seconds away from being mauwed...
Speaking of being mauwed... Lucy loved her mini quesadilla with spinach and cheese too...

Here is a close up. Notice the red sauce on top. That is a homemade chipotle cream sauce Cole and I made to go along with the meal. It was good but needs a little tweaking. The pork and tortillas really stole the show tonight. Read on to see us make our Chipotle sauce.

I am a sucker for anything labeled chipotle at restaurants and have decided that I could make my own killer chipotle sauce. A while ago we bought a big bag of dried chipotle peppers. I took about five of them and tore off the stems and took out the seeds. Then I put them in the oven at 400 degrees for about five minutes. Just long enough so you can smell them and long enough to not burn them.
Then I put them in warm water to reconstitute the peppers.

Then I put them into the blender with about a cup of greek yogurt, a splash of honey, lemon juice and a little salt.

Here is Cole with a mouthful of some really good tacos. We are quite the team when it comes to cooking. It is somting we both like to do, and we do pretty well at it!. Let me know if you have a good recipe for chipotle sauce because I would love to hear about it.

Monday, April 23, 2012

Banners & Birthdays...


Whew... What a wonderful weekend in Astoria... On Saturday we celebrated Lucy's 1st birthday with lots of close friends and family. It was a GREAT day! The best part about the day was that the weather was A-mazing... I mean people left my house and ventured into the back yard... Where they enjoyed our finished deck. Wouldn't you know it...?  I took zero before and after pictures of our deck. My Mark worked all day Saturday to finish the second level of it. (It was our Christmas present) I also didn't take any outdoor photos. My head was in the clouds I guess. I want to share a few details from her party with you and another craft I made for her party. So I will start with the banner I made her.
Last week I set out to make her a banner. I recently purchased some great oilcloth scraps and knew I could do something cool with them. After I made her banner I realized I didn't like it because it looked Hawaiian which was not the theme of the party so I set out to make her a better one...
 I decided that on  my second go around I would back the letters with burlap. I just had to decide which oilcloth I liked better for the letters. I decided on the blue/green one.
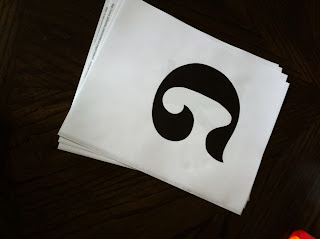
Then I went to the computer to find a font I liked. I used "storybook" I think. Then I blew the font up to like 500+. I cut out the letters and placed them strategically on the fabric. I don't want to waste any of this stuff cause its too cool.
 I traced around the letters...
 Cut them out...
 Then I cut out some large triangles from some of my coffee sacks. Still the ones I scored for $0.99. Even though people have been telling me that I can get them for free from one of the local coffee shops in town.
 Then I glued them on with my hot glue gun and strung them up with yarn and mini clothespins and wouldn't you know after they adorned the party as a decoration I hung them above Lucy's crib. Pretty stinking cute huh?
 Close up on the mini clothespins. I love these...

 This picture is pretty washed out from the sun (and I am no pro-photographer)so you can't tell how awesome the banner really is but it looked neato hanging at the party next to the poms I made here.
I really like the banner and I love that it is not a one time use piece cause now it decorates the little ladies room. I might be a new found banner freak and make banners as gifts for all of our upcoming parties... Watch out...
Lets take a peek at some more b-day highlights... (Keep in mind Buckaroo theme)

This was the dessert table my Marcia, Mommy and Sis made cupcakes and I made a cream puff topiary... Very addictive...
 Long time love of my life Lynds and Lucy's future husband Charlie... Matching hats from her hub...
 Check out Lucy's dress. I mean I think its the cutest thing ever. It was a Target score. One of Gwen's pieces you can buy here. Also Lucy loves candy now.. Thanks Grandpa...
 I had this really cute little station that asked the guests to take a second to offer Lucy some words of wisdom to live by. Yet No one did it. It was really my fault though because I was sort of a lame hostess and didn't tell people to do it. Once everyone showed up I kinda shut down. I walked around like I was in a dream. I usually love being the center of attention but I think I was overwhelmed by the thought of my baby being one. Birthdays are crazy and emotional and exhausting.
 This was the goody bag/ stick horse table. Here are Lucy's boots which she refused to put on so we used them as decor. They are still too big so I guess it was ok.
Here are the poms hanging...

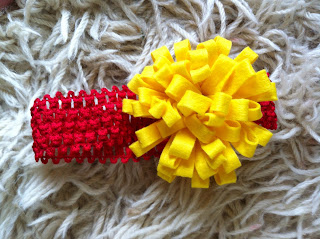
I really don't like this picture of myself but I have to share it because it shows the headband I "tried" to make for Lucy. It was a craft FAIL. Last week I made felt flowers for her headband.... They were cute, until I put it on her head. It popped out like something you see on a roast Turkey leg. She hated it so I ditched it. (This is also the only picture I could find that showed my awesome new tablecloth, its a yellow oilcloth. LOVE


Ok so I didn't take nearly enough pictures of Lucy's party. I didn't even pick up the camera really but I did clean before the party and I wanted to share a clean house pic with you guys. Also this picture shows the new chairs I got from Craigslist for $30....For the Pair!! I love them and I cant wait to reupholster them...someday. For now I added a decorative pillow to fancy them up.


All in all we have a one year old now, and the sun was shining all weekend. What more could a girl ask for...Oh yeah a flowerbed, which I got yesterday after some hard man and woman sweat... I will post more on that later cause it is pretty impressive...