Showing posts with label craft. Show all posts

Wednesday, September 19, 2012

Tis the season


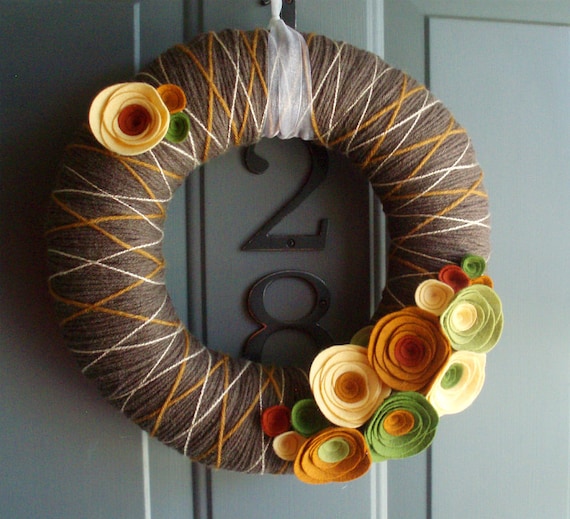
I have been spending way too much time on Pinterest as of late. What's new right? Anyways, I have known now for a while that I wanted to make a new wreath for my front door because my old one was looking a wee bit droopy. Here are some of the ones off Pinterest that I have been eyeballing...

Yarn Wreath Felt Handmade Door Decoration -  Fall In Line 12in
Love the yarn look. Looks like a lot of work. More time than I have for today but you can buy this one here.
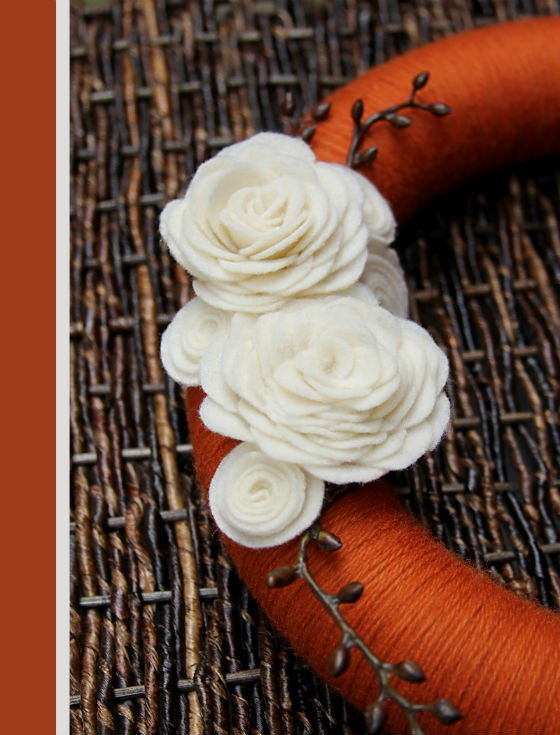
Still love this one too from Yellow Mums.

So I set off to my craft chest... Holy Jesus do I need a lesson on organization or what.
I pulled out my handy glue gun and my utility knife and I went to the basement to grab some more supplies. Here's my pile to draw creativity from.
Then I found this old Christmas wreath in the garage. Score! I am not going to have to spend a cent on this wreath. Not to mention I couldn't go anywhere to buy anything if I wanted cause the babes are asleep.... And I am sure as hell not waking them up.

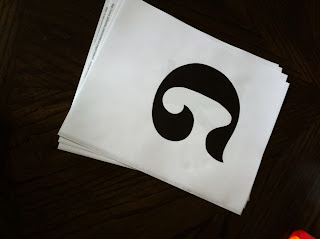
I am still on the monogram kick so I decided that my wreath would need to have a big fat "J" for Jannusch. I tried like 10 times to make a "J" that I liked.

I had some leftover white burlap form a lampshade I made and decide to trace my cardboard "J" and hot glue it to the burlap.
Then I took some fabric and made a couple of Mum looking flowers (since they are a fall flower.) I didn't document my flower making process but you can find the tutorial here.

All done...


I also LOVE it on my new red door that my man painted for me when I was gone one weekend.


Thursday, May 31, 2012

A new place to call home....?

I finally did it! By "it" I mean finished the hutch I purchased forever ago off of Craigslist..... Remember from this post here....?


 It has been hiding in my dark, dirty garage for several months now but after I cleaned out my garage this past weekend I was inspired to finish it. It was collecting more dust and getting destroyed by other DIY projects. For example, when I was spraying the lamp I accidentally sprayed part of the hutch see..... Ooops
This really bummed me out because I wasn't sure that I wanted to paint it. I kinda liked the two toned wood color. But now I was stuck to paint the beast. I really didn't know what color I wanted to paint it. I knew I needed to mute down the bright colors in my house because I am out of control with color. That's when I found myself in Home Depot picking a navy blue color.

Here is the hutch all washed up ready for it's first coat.... The Before...
Here she is all sprayed out after one coat. ( I did three.) I kinnda freaked at first because the paint did not look navy at all until it dried.


Now this peice is old and musty smelling. So I took out my wood cleaner washed it down. Then I took some decorative papers I had and lined the drawer and doors with them.

 I did this with spray adhesive. I love this stuff by the way...

Then it was time to purchase some new hardware for the hutch. So I headed down to my local vintage hardware store where I purchased four knobs; two for the drawer and two for the doors. (I still am not 100% sold on the light blue knobs. I might exchange them for yellow.)


So are you ready for the before and after!!??? Here we go....
Before
After
 Sorry the pictures are washed out. I had to take these on my phone since our camera battery is dead....
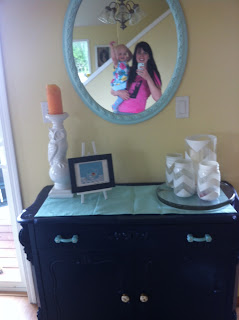
The Hutch works in our house. It is growing on me day by day...

 I am constantly changing whats on top of the hutch but for the sake of these pictures I have one of my long time favorite post cards called "Hey Hey Sugarcube." Oh and there is the wise old owl candle holder.
 On the other side of the hutch I have my DIY spray painted mason jars....
 Look how stunning the decorative paper looks lining the drawer. I am in love with it. Not to mention I love the color orange!!! LOVE LOVE IT!

Now I need to explain the title of this post to you. You see since the minute we brought this piece in the house, Lucy has discovered it as her new little home. She loves to open and close the doors, sit inside it and close herself in it. It scares the heart out of me that shes going to crush a finger or somthing... But she loves it like crazy. See....

 Open close.. Open close... All the other cupboards in our house have magnetic locks... This is freedom...
Here she is trying to save her best friend Weston from the dogs by helping him hide in the hutch... Best place ever....

 To say the least we love staring at our new fun furniture piece in the house.... Did I mention that there is a mirror over the hutch so we can stare at ourselves. We really like doing that too because we both think we are pretty funny making each other laugh a lot....


What do you think?


Wednesday, May 9, 2012

DIY Lemon hand Scrub... Mothers Day Idea?

As we all know Mother's Day is coming up on Sunday. Now I would like to think the day will be all about me since I am now a mom. However, I know that there is a special lady in my life that deserves some extra TLC too. So I have been browsing my favorite sites looking for inspiration on things to make for the different women in my life. Then it dawned on me that I have the materials to make a super easy/cheap/cute/useful gift right here in my own home. You see, several months ago we celebrated the classified staff at our school and I made an awesome sea salt hand scrub for some of my favorite ladies that I work with day in and day out. I originally got the idea from this site here called kristanlynn.com.

I rounded up all the ingredients I needed:  
-1 cup of sea salt. ( I found mine at Costco for maybe $3 and you can make a lot from it.)
-1/4 cup of olive oil. (the other site says you can use other oils too)
-1 tsp of lemon juice
-1 tsp of lemon zest even though I added a ton extra because I love everything lemony!
 
Then all you do is mix the oil and salt together in a bowl. Next add the lemon juice (be careful not to add too much or else your salt will dissolve and that would not be pretty). After that take out your zester or if you're like me and don't have one, take out your cheese grater and grate that lemon away. I had a few tangerines too so I grated the skins in for a citrus burst! Then I poured them into some mason jars I had laying around in my garage.
I made a bunch! Then you can add some cute detailing like fabric and yarn to personalize it to make it super great.
Next time, someday in the future when my lavender is growing nice and wild and free, I am going to pick it and add it to a salt scrub. Wouldn't that smell nice! You should whip some of this goodness up and give it to yo' Momma in a cute little basket with other things she loves. (Don't get your hopes up Mom! You know how bad I am about getting things in the mail on time xxoo)

Monday, April 23, 2012

Banners & Birthdays...


Whew... What a wonderful weekend in Astoria... On Saturday we celebrated Lucy's 1st birthday with lots of close friends and family. It was a GREAT day! The best part about the day was that the weather was A-mazing... I mean people left my house and ventured into the back yard... Where they enjoyed our finished deck. Wouldn't you know it...?  I took zero before and after pictures of our deck. My Mark worked all day Saturday to finish the second level of it. (It was our Christmas present) I also didn't take any outdoor photos. My head was in the clouds I guess. I want to share a few details from her party with you and another craft I made for her party. So I will start with the banner I made her.
Last week I set out to make her a banner. I recently purchased some great oilcloth scraps and knew I could do something cool with them. After I made her banner I realized I didn't like it because it looked Hawaiian which was not the theme of the party so I set out to make her a better one...
 I decided that on  my second go around I would back the letters with burlap. I just had to decide which oilcloth I liked better for the letters. I decided on the blue/green one.
Then I went to the computer to find a font I liked. I used "storybook" I think. Then I blew the font up to like 500+. I cut out the letters and placed them strategically on the fabric. I don't want to waste any of this stuff cause its too cool.
 I traced around the letters...
 Cut them out...
 Then I cut out some large triangles from some of my coffee sacks. Still the ones I scored for $0.99. Even though people have been telling me that I can get them for free from one of the local coffee shops in town.
 Then I glued them on with my hot glue gun and strung them up with yarn and mini clothespins and wouldn't you know after they adorned the party as a decoration I hung them above Lucy's crib. Pretty stinking cute huh?
 Close up on the mini clothespins. I love these...

 This picture is pretty washed out from the sun (and I am no pro-photographer)so you can't tell how awesome the banner really is but it looked neato hanging at the party next to the poms I made here.
I really like the banner and I love that it is not a one time use piece cause now it decorates the little ladies room. I might be a new found banner freak and make banners as gifts for all of our upcoming parties... Watch out...
Lets take a peek at some more b-day highlights... (Keep in mind Buckaroo theme)

This was the dessert table my Marcia, Mommy and Sis made cupcakes and I made a cream puff topiary... Very addictive...
 Long time love of my life Lynds and Lucy's future husband Charlie... Matching hats from her hub...
 Check out Lucy's dress. I mean I think its the cutest thing ever. It was a Target score. One of Gwen's pieces you can buy here. Also Lucy loves candy now.. Thanks Grandpa...
 I had this really cute little station that asked the guests to take a second to offer Lucy some words of wisdom to live by. Yet No one did it. It was really my fault though because I was sort of a lame hostess and didn't tell people to do it. Once everyone showed up I kinda shut down. I walked around like I was in a dream. I usually love being the center of attention but I think I was overwhelmed by the thought of my baby being one. Birthdays are crazy and emotional and exhausting.
 This was the goody bag/ stick horse table. Here are Lucy's boots which she refused to put on so we used them as decor. They are still too big so I guess it was ok.
Here are the poms hanging...

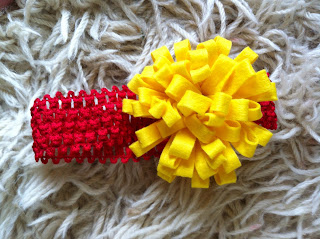
I really don't like this picture of myself but I have to share it because it shows the headband I "tried" to make for Lucy. It was a craft FAIL. Last week I made felt flowers for her headband.... They were cute, until I put it on her head. It popped out like something you see on a roast Turkey leg. She hated it so I ditched it. (This is also the only picture I could find that showed my awesome new tablecloth, its a yellow oilcloth. LOVE


Ok so I didn't take nearly enough pictures of Lucy's party. I didn't even pick up the camera really but I did clean before the party and I wanted to share a clean house pic with you guys. Also this picture shows the new chairs I got from Craigslist for $30....For the Pair!! I love them and I cant wait to reupholster them...someday. For now I added a decorative pillow to fancy them up.


All in all we have a one year old now, and the sun was shining all weekend. What more could a girl ask for...Oh yeah a flowerbed, which I got yesterday after some hard man and woman sweat... I will post more on that later cause it is pretty impressive...