Showing posts with label hardware. Show all posts

Thursday, May 31, 2012

A new place to call home....?

I finally did it! By "it" I mean finished the hutch I purchased forever ago off of Craigslist..... Remember from this post here....?


 It has been hiding in my dark, dirty garage for several months now but after I cleaned out my garage this past weekend I was inspired to finish it. It was collecting more dust and getting destroyed by other DIY projects. For example, when I was spraying the lamp I accidentally sprayed part of the hutch see..... Ooops
This really bummed me out because I wasn't sure that I wanted to paint it. I kinda liked the two toned wood color. But now I was stuck to paint the beast. I really didn't know what color I wanted to paint it. I knew I needed to mute down the bright colors in my house because I am out of control with color. That's when I found myself in Home Depot picking a navy blue color.

Here is the hutch all washed up ready for it's first coat.... The Before...
Here she is all sprayed out after one coat. ( I did three.) I kinnda freaked at first because the paint did not look navy at all until it dried.


Now this peice is old and musty smelling. So I took out my wood cleaner washed it down. Then I took some decorative papers I had and lined the drawer and doors with them.

 I did this with spray adhesive. I love this stuff by the way...

Then it was time to purchase some new hardware for the hutch. So I headed down to my local vintage hardware store where I purchased four knobs; two for the drawer and two for the doors. (I still am not 100% sold on the light blue knobs. I might exchange them for yellow.)


So are you ready for the before and after!!??? Here we go....
Before
After
 Sorry the pictures are washed out. I had to take these on my phone since our camera battery is dead....
The Hutch works in our house. It is growing on me day by day...

 I am constantly changing whats on top of the hutch but for the sake of these pictures I have one of my long time favorite post cards called "Hey Hey Sugarcube." Oh and there is the wise old owl candle holder.
 On the other side of the hutch I have my DIY spray painted mason jars....
 Look how stunning the decorative paper looks lining the drawer. I am in love with it. Not to mention I love the color orange!!! LOVE LOVE IT!

Now I need to explain the title of this post to you. You see since the minute we brought this piece in the house, Lucy has discovered it as her new little home. She loves to open and close the doors, sit inside it and close herself in it. It scares the heart out of me that shes going to crush a finger or somthing... But she loves it like crazy. See....

 Open close.. Open close... All the other cupboards in our house have magnetic locks... This is freedom...
Here she is trying to save her best friend Weston from the dogs by helping him hide in the hutch... Best place ever....

 To say the least we love staring at our new fun furniture piece in the house.... Did I mention that there is a mirror over the hutch so we can stare at ourselves. We really like doing that too because we both think we are pretty funny making each other laugh a lot....


What do you think?


Friday, April 6, 2012

Holy Bird Cage

Well my Spring 2012 Restoration Hardware catalogue came the other day. I was so excited that I ripped it open and ran over to the sitting area where I was about to sit down and read it when of course I got distracted by something. I can't remember what got me (I probably realized the baby gate was open or something. God knows Lucy loves climbing up them but she isn't great at coming down) all I remember is that I didn't get to divulge in the over-indulgent catalogue. Of course I can't afford anything from this catalogue but a girl can dream and more importantly get ideas. Check out the girth on this baby...
As I was reading through it I was waiting for that moment of inspiration for my next DIY project instead I was in awe and shocked at what I found on page 136...
Can you believe what you are seeing? That my friends is a birdcage chandelier. It is the biggest thing ever. Part of me loves it and part of me hates it. How can this thing fit into any ones house. I mean I am visualizing it in some dark, hot nightclub with maybe a dancer on the inside. It would take up a whole room in my house. It is a true work of art but holy bird cage! I guess the bird fascination is in its next stage and has evolved to birdcages. Well if this birdcage is right up your alley you can purchase it here.
After the holy cowness wore off I decided to keep reading and I found myself fixated on the light fixtures. Like this lovely lamp below. Simple nice lines and clean looking. I need all the clean fixtures I can get in my house to compensate for all the messes.
 I also loved this spread. Maybe it is the Montana in me that loved the horns. I know they are not for everyone but they have a certain sense of nostalgia for me. No I am not a hunter. I couldn't kill anything if you paid me a million bucks. I can't even kill one of the ladybugs that are infesting our house right now. Lucy on the other hand... Well I have finger swiped two from her mouth...Lovely
 Then I came to the part of the magazine that inspired me and compared to the grand catalogue my inspiration was simple a relatively cheap considering...
Wouldn't this look nice above my redone kitchen table. I love the over sized Edison light and the simple shape. Not too fussy not too plain.
 And it is priced at $129.00 which would still require some saving but nowhere near as much as the birdcage light at almost $3000.


 See wouldn't it look nice hanging over my table. Right now we have a boring old light that looks like a big old boob. Looking at this picture also makes me want to paint my cupboards ...dark ...or light?
Or maybe we should replace these funky ones with them. These bad boys pictured below are up for grabs..By the way

Brushed something look... Maybe nickle?

Ok.... I need to get off the couch because as this is what it looks like out my window and god knows we don't get enough sun. Off Lucy and I go to enjoy this day. I hope all of you out there are having a magical day and hopefully a sunny one. PS it's Friday so that means its time for a beer too... Would it be bad if I put the beer in my stroller cup holder on our walk...?

Friday, March 30, 2012

Take a load off...


The other day I came across this build your own ottoman on Shanty to Chic's site here. The ottomans are so flippin cute that I knew I had to make them. So I pinned it to my "gonna make it myself" page on Pinterest, and set out to the good old Home Depot. OK I am getting ahead of myself here. First I have to tell you that the plans for these ottomans actually come from this site here by Ana White. The lady is a freak of nature. (That is why I am in no way shape or form going to give you the Angie J tutorial. Instead I will refrence you to her link here.)She shows you how to make anything your heart desires with step by step instructions. She even gives you a cut list for your lumber. Like this...

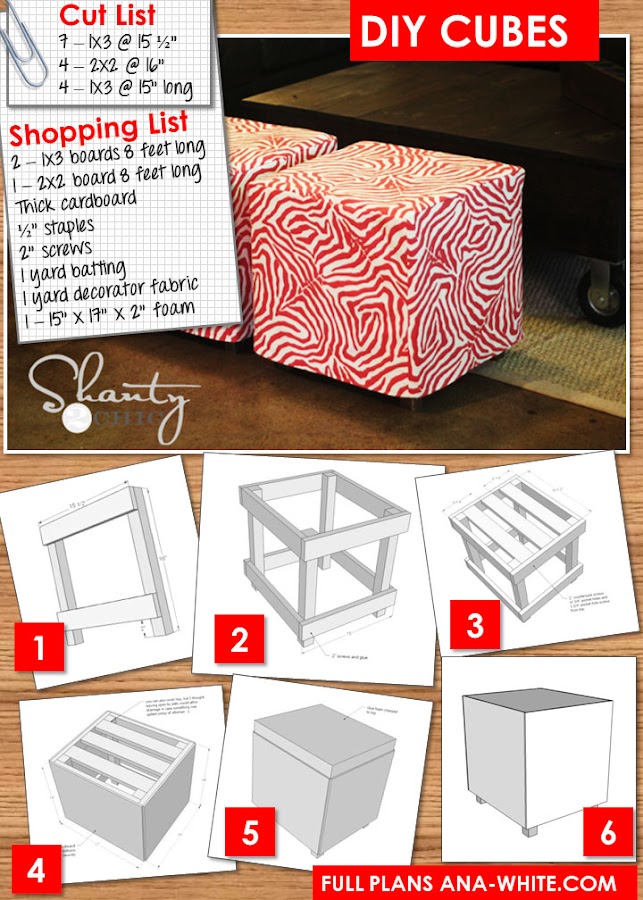
Neat huh? So then I took my little cut list into the HD and found the first guy who looked like he knew what he was talking about and I showed him my cut list and told him I wanted to make them cheap. Of course you know whats coming next, I told him we can use wood from the cull bin of course, if they had my dimensions. Guess what they did!... All of it. So I got my wood for around four bucks and he cut it ALL for me. I know this might be cheating but who cares. Here is my guy cutting my wood for me... Thanks nameless HD worker... And for those of you who have never witnessed the cull bin, that's it right there.


I was so excited to start this project that I jumped right into it. OK this is where things went wrong and I needed to humble myself. You see I never took woodworking and I don't know the first thing about power tools. My learning curve is super high and I am learning. This one project has taught me patience and how to work a drill like a bad ass. Below is a picture of my hand after I punctured it with a drill bit. I have more respect for power tools and for wood. You cannot just drill into it. The wood cracks without a pre drilled hole and you need to use wood glue. Oh yeah, take it from me and follow each direction and square up constantly or else you will pay and have to redo it over and over again. So needless to say I waited until Cole got off work and we had a little drilling 101 session.
So here is my drilling lesson from Cole on pre drilling and working the drill.
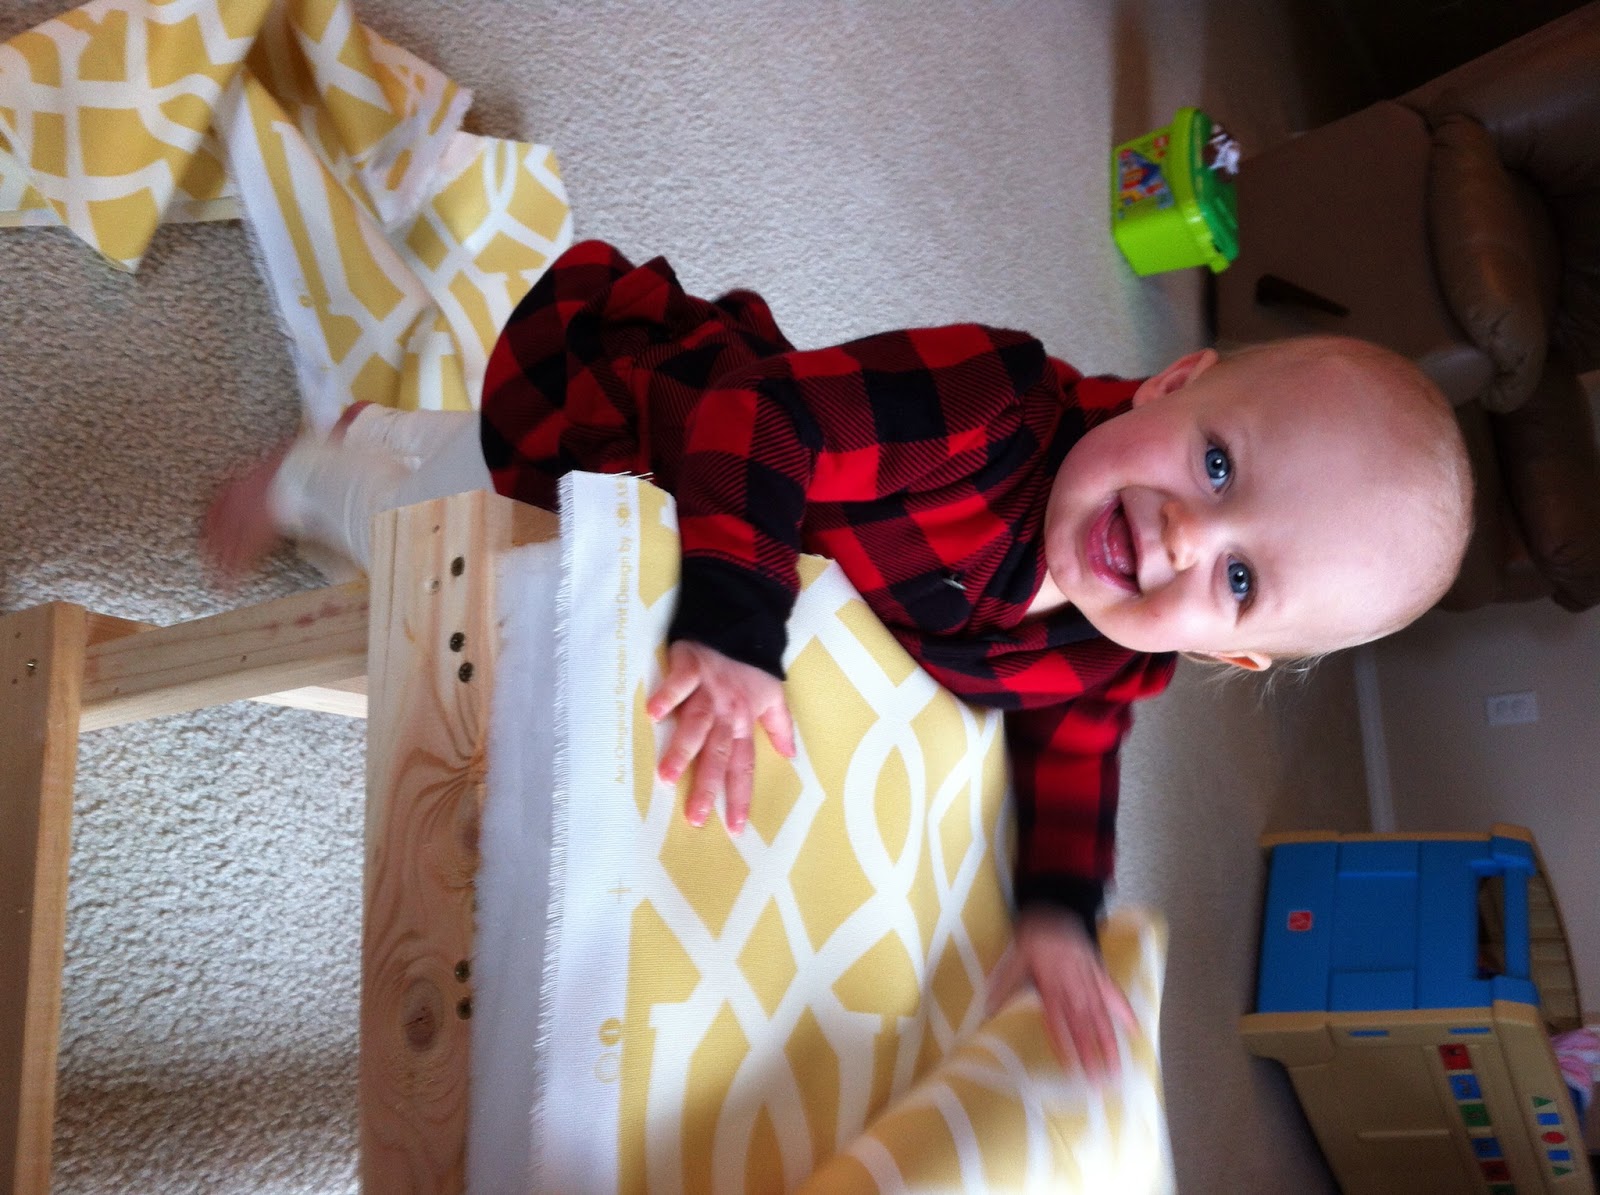
 Here I am working it. Notice all my pre cut lumber. Did I mention they didn't charge me extra to cut it. What!?
 My wood all pre drilled...
 My finished first cube... I am not attempting to tell you how to make this. Ana White as referred above does a much better job so please again follow her directions here.

 Next I cut my foam down for the cushion on top of the ottoman. I used a 3" thick piece instead of 2" thick like they call for. I just measured an extra inch for my fabric. Then I used spray adhesive to glue them to the top of the ottoman. (note: you should spray directly onto the foam then glue it to the wood.)
 OK so Ana White doesn't give you directions on how to make the slip cover. Shanty to Chic does here. Again as I have posted before my learning curve is through the roof with sewing. Lucky for me, Cole's Grandparents are in town from Montana for Spring Break and they were able to assist me and give me guidance over at Cole's Mom's house. Now for you newbies like myself, measuring fabric sucks booty big time, but you have to do it. I wanted two slip covers from two yards. It was like solving a puzzle and I am not good at puzzles. Patience is the name of the game. Which I am also not good at.
 Once the fabric was all cut Lucy Lou admired how nice it would look on her new piece of furniture. Upholstery fabric is spendy! Just save your coupons. I used my 40% off coupon to Joanns. I am pretty sure I purchased an outdoor fabric too. This will help with sticky fingers not to mention I can just throw them in the wash.

 Here I am sewing all the pieces together.
 I was not going to hem the bottom because I hate the pins but Grandma Judy insisted and she's a pro so she very graciously pinned it for me then I sewed the hem line. They look so much better and won't fray out now. Thanks Judy.

And wait for it ...... TaDaaaa.... My finished ottoman. How beautiful...
 Lucy says there is lots of business to be had on this ottoman. Like walking around it and stuff.
 Then I brought them home and look who else loves them. LOLA.... Actually Lola is really vain and probably just wanted her picture taken.
We had some good friends surprise us last night and they were a hit! What is it with my dogs always wanting to be in the picture? Hurley. (Notice we haven't added curtains to the sliding glass doors, which I have plans to make into french doors.) Another post a long time from now.

 They look great in my sitting room/Living room.... Not to mention the 3" of cushion is nice on a tushy...
 Once all is said and done, I would make these again. They were not simple because I did not have the skills to make them right away. Now that I am leaning I could make them again without as much difficulty. One lady said she made them during her kids nap time. Now, unless Lucy takes 8 hour naps I wouldn't agree with this lady. But I am sure I could make them a lot quicker this time. For the price too, you really can't beat it and they are adorable. I want to add some green Pom-poms to the bottom. What do you think?

One last little look...