Showing posts with label burlap. Show all posts

Monday, December 10, 2012

Burlap-ness Tree Skirt

The Holidays are definitely well under way and we are very ready for them in this house. As I had mentioned earlier, we recently made a trip south to get our tree from the beach house. Mark started planting trees around the property years ago and now most of them are huge. Too huge in fact to fit in our houses accordingly. However, Cole and Lucy found a tree that would look nice all decorated and lit up. Above is a picture of the crew trimming the tree so that it would fit in our house. After the tree was up and all decorated I realized that I wanted something better for our tree. I wanted a nice tree skirt to really make our tree amazing. You see for the past several years I have been using curtains from my college years. I knew exactly what I wanted to make and after several discussions with my friend Chelsea we decided that we were going to craft the ever popular ruffled tree skirt off of Pinterest. If my directions throw you for a loop you can follow these directions and images here from Done over Decor.

First I found an old duvet cover (my childhood duvet cover actually, which I could never part with but now I feel better knowing that it will be a magical part of our lives for years to come!) then Chelsea traced around it with an old Christmas tree skirt I purchased from Goodwill. Which I am totally returning for $3.99 I know that makes me sound cheap but really I mean every penny counts here.
Then we collected our fabrics. I used burlap from leftover coffee bags I had and Chelsea used green and cream burlap from our local Joann's store. Then we started cutting it into strips four inches wide.

Then we put on gardening gloves because working with burlap and hot glue is a sticky hot mess. Then we started gluing away leaving room for a ruffle fold every five to six inches or so.
 Then we added a second layer. This project took a lot of fabric. I would estimate several yards of each color or around three to four coffee bags.
 Then my little monster woke up and wanted to over love on Chelsea's beautiful brand new baby Jack. It was quitting time then.
Several mornings later during nap time I got back in the saddle and started gluing away on mine again.
 After several hours of hard determined work I was finished and very happy with my results. I feel like our monstrous tree takes away from the skirt but until next year when we can downsize all I can say is .... I am pretty damn proud of the outcome.
 And my kid looks good in front of it.
 And I love the simple burlap-ness of it.
 Here is a picture of our tree. I know what your thinking ... But it is ours and that's all the matters.

Do it, Make it!


Monday, April 23, 2012

Banners & Birthdays...


Whew... What a wonderful weekend in Astoria... On Saturday we celebrated Lucy's 1st birthday with lots of close friends and family. It was a GREAT day! The best part about the day was that the weather was A-mazing... I mean people left my house and ventured into the back yard... Where they enjoyed our finished deck. Wouldn't you know it...?  I took zero before and after pictures of our deck. My Mark worked all day Saturday to finish the second level of it. (It was our Christmas present) I also didn't take any outdoor photos. My head was in the clouds I guess. I want to share a few details from her party with you and another craft I made for her party. So I will start with the banner I made her.
Last week I set out to make her a banner. I recently purchased some great oilcloth scraps and knew I could do something cool with them. After I made her banner I realized I didn't like it because it looked Hawaiian which was not the theme of the party so I set out to make her a better one...
 I decided that on  my second go around I would back the letters with burlap. I just had to decide which oilcloth I liked better for the letters. I decided on the blue/green one.
Then I went to the computer to find a font I liked. I used "storybook" I think. Then I blew the font up to like 500+. I cut out the letters and placed them strategically on the fabric. I don't want to waste any of this stuff cause its too cool.
 I traced around the letters...
 Cut them out...
 Then I cut out some large triangles from some of my coffee sacks. Still the ones I scored for $0.99. Even though people have been telling me that I can get them for free from one of the local coffee shops in town.
 Then I glued them on with my hot glue gun and strung them up with yarn and mini clothespins and wouldn't you know after they adorned the party as a decoration I hung them above Lucy's crib. Pretty stinking cute huh?
 Close up on the mini clothespins. I love these...

 This picture is pretty washed out from the sun (and I am no pro-photographer)so you can't tell how awesome the banner really is but it looked neato hanging at the party next to the poms I made here.
I really like the banner and I love that it is not a one time use piece cause now it decorates the little ladies room. I might be a new found banner freak and make banners as gifts for all of our upcoming parties... Watch out...
Lets take a peek at some more b-day highlights... (Keep in mind Buckaroo theme)

This was the dessert table my Marcia, Mommy and Sis made cupcakes and I made a cream puff topiary... Very addictive...
 Long time love of my life Lynds and Lucy's future husband Charlie... Matching hats from her hub...
 Check out Lucy's dress. I mean I think its the cutest thing ever. It was a Target score. One of Gwen's pieces you can buy here. Also Lucy loves candy now.. Thanks Grandpa...
 I had this really cute little station that asked the guests to take a second to offer Lucy some words of wisdom to live by. Yet No one did it. It was really my fault though because I was sort of a lame hostess and didn't tell people to do it. Once everyone showed up I kinda shut down. I walked around like I was in a dream. I usually love being the center of attention but I think I was overwhelmed by the thought of my baby being one. Birthdays are crazy and emotional and exhausting.
 This was the goody bag/ stick horse table. Here are Lucy's boots which she refused to put on so we used them as decor. They are still too big so I guess it was ok.
Here are the poms hanging...

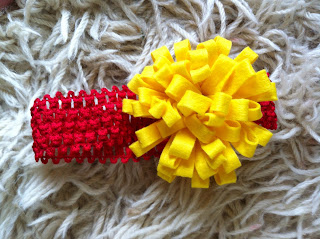
I really don't like this picture of myself but I have to share it because it shows the headband I "tried" to make for Lucy. It was a craft FAIL. Last week I made felt flowers for her headband.... They were cute, until I put it on her head. It popped out like something you see on a roast Turkey leg. She hated it so I ditched it. (This is also the only picture I could find that showed my awesome new tablecloth, its a yellow oilcloth. LOVE


Ok so I didn't take nearly enough pictures of Lucy's party. I didn't even pick up the camera really but I did clean before the party and I wanted to share a clean house pic with you guys. Also this picture shows the new chairs I got from Craigslist for $30....For the Pair!! I love them and I cant wait to reupholster them...someday. For now I added a decorative pillow to fancy them up.


All in all we have a one year old now, and the sun was shining all weekend. What more could a girl ask for...Oh yeah a flowerbed, which I got yesterday after some hard man and woman sweat... I will post more on that later cause it is pretty impressive...


Thursday, April 19, 2012

Have Glue Gun... Will Craft


Today was one of those days where I had a mile long to do list in my head. Yet, I never wrote my to do list down and I kept forgetting what I needed to do. So instead I just started lots of projects all at once. I got really overwhelmed as I sat in a filthy house at a disastrous kitchen/craft table. After a small pep/organization conversation with myself I decided to call my Mom-in-law. I knew I needed to clean my house (cause I really haven't done one of those deep cleans in a long long time) and asked for her to watch Lucy after work so Cole and I could do an intense deep clean. After the call, (babies had just gone down for their nap) I allowed myself one project at a time. Lucy's birthday party is Saturday so I have lots to do until then. We are trying to do the party on the cheap and I am trying my best to make all the decorations instead of buying them. I also know that as the Mom hostess it is my duty to provide a little take away for all of the other kids at the party. I had a bunch of felt out with leftover burlap. I had no idea what to make so I turned to the trusted Pinterest. After searching for a while I found this little pin here....
Pinned Image
 You can purchase this little bad boy from the Etsy store here. ( $3.50 not bad huh?) Since I didn't want to invest that much money in the favors I decided to try and make them myself.... Take a look...

I started by making a template... Cut out two pieces
Then I wrapped yarn around four fingers so I could get a lot of pieces the same length for the mane..
Next I laid out the yarn, crafted an ear and went nuts with the glue gun.
 I glued the two pieces together....
 Then I crafted a bridal out of some leftover burlap.
 Glued on a felt eye and there you have it a pony for all the kids to take home. Now I need to find some candy sticks to shove in them. I mean gently place in them. Yee Haw Ride Em Cowgirl!
I should mention that I made 11 of them. I got myself a herd...
Ok the babes literally woke up as I glued on the last eye and it was amazing! I knew I still had crafting to do but it would have to be an easy one that I could keep coming back to. So I decided to make some poms for her party. I used to make the tissue paper flowers with my students so I knew I could make a pom. I did and they look amazing. You have to recreate these for your next party. My inspiration picture....

You can follow their super easy tutorial here or you can test your luck with mine...First you need to start with 8 sheets of tissue paper. My first go around I used the whole sheet which made one large red pom then I cut my yellow/orangie paper in half to make two smaller ones..
Start by accordion folding the paper all the way down til the end of the paper..
 Once totally folded I tied a piece of yarn around the center so I have string to hang it from the ceiling.
 Then I cut off the ends cause I like the rounded ends.
 One by one, separate all the sheets... You will start to see magic unfold before your eyes. Behold the POM!!!!
This is my massive red one...
All three together... I can't wait to show them to you when they are all hung up hanging around in all their birthday glory... Oh yeah and they will be reused after Lucy's party. My  other little baby that I watch (Mr. Weston) is also turning one and his Momma wants them for his party... Yeah recycling... Anyways you need to make these they are super easy and adorable.. Do It... Then I cleaned and it was boring so I didn't take photos of that. But our upstairs is sooooo clean. Cleaner then ever before.